HowToForYou.com – Connecting a PC to a TV with an HDMI cable is a straightforward way to use a television as a larger display. Once connected, you can choose whether to mirror your computer screen, extend the desktop across both displays, or use the TV as the only screen.
The basic setup requires an HDMI cable and, depending on the ports available on your computer, possibly an adapter. Windows also provides display settings that let you control how the two screens work together.
What You Need to Connect a PC to a TV
Before connecting anything, check the ports on both your computer and television.
You will generally need:
- An HDMI cable
- A free HDMI port on your TV
- An HDMI port on your PC, or a compatible adapter
- A TV remote with a Source or Input option
If your computer does not have a standard HDMI port, check for another compatible connection.
Which PC Ports Can Be Used?
Depending on the computer, you may find:
- HDMI
- HDMI mini
- MiniDisplayPort
- DisplayPort
- USB-C
- VGA
- DVI
A USB-C port can be used with a USB-C-to-HDMI adapter. For HDMI mini, MiniDisplayPort, or DisplayPort connections, a suitable cable with an HDMI connector can be used.
Older computers may have VGA or DVI connections. These can be connected to a TV using a VGA-to-HDMI or DVI-to-HDMI adapter. However, the source material notes that audio will continue to come from the computer when using these connections.
How to Connect a PC to a TV Using HDMI
The physical connection is only part of the setup. After plugging in the cable, you also need to select the correct HDMI input on the television and configure Windows.
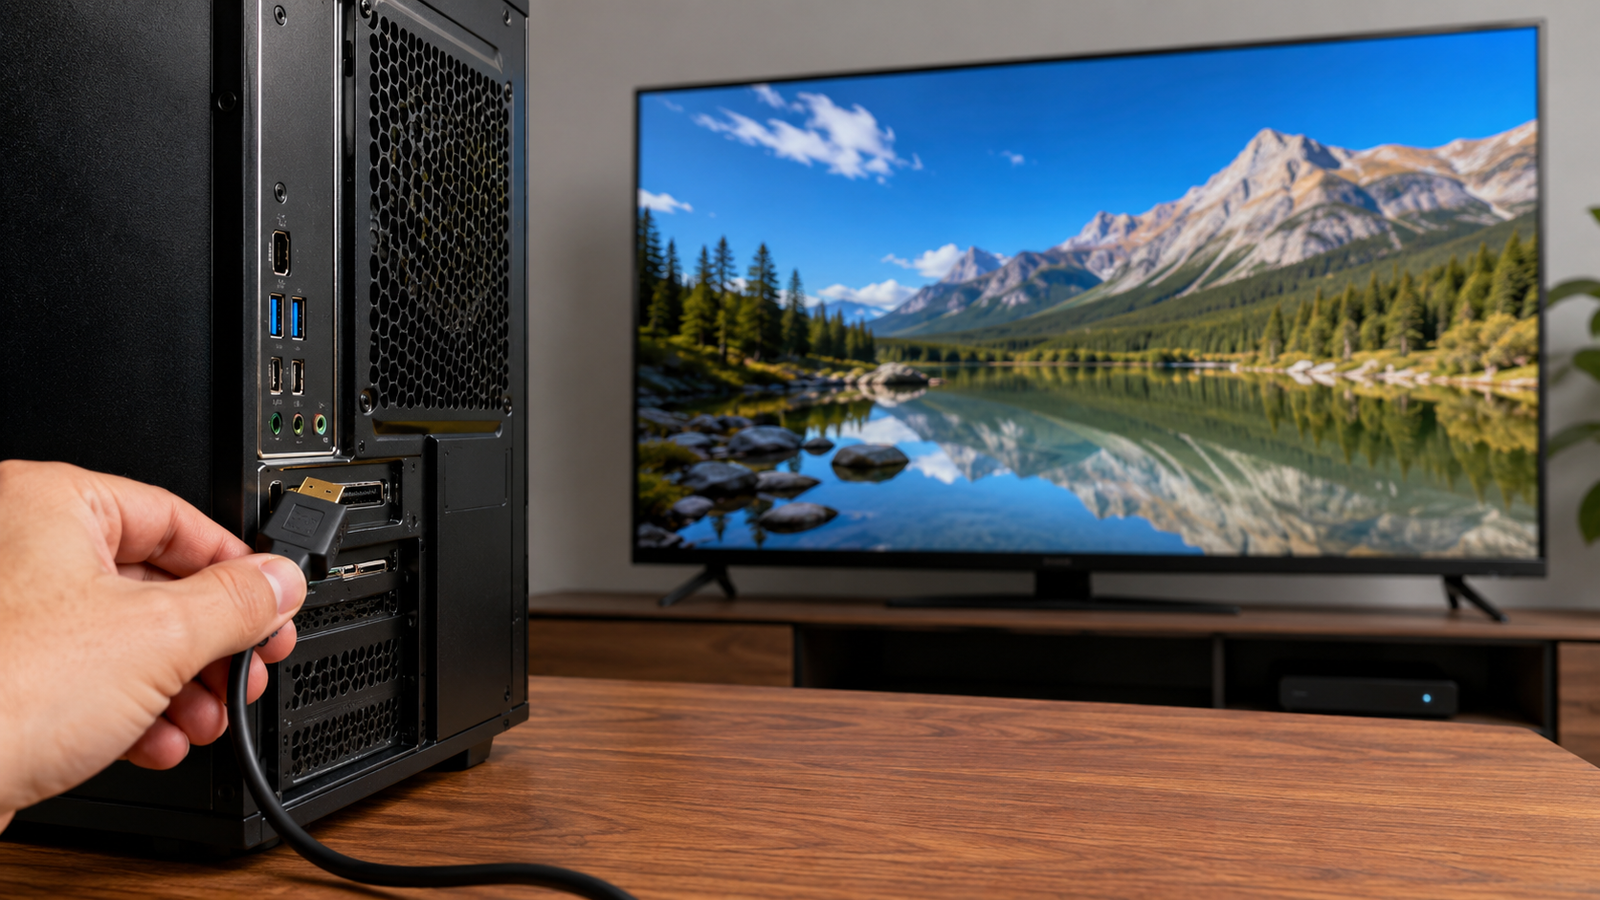
Step 1: Connect the HDMI Cable to Your PC
Locate the HDMI port on your computer.
On a desktop PC, it is usually located on the back of the computer. On a laptop, it is generally located along the side.
Plug one end of the HDMI cable into the computer.
If your computer does not have a standard HDMI port, use the appropriate adapter or cable for its available connection.
For example, a computer with USB-C can use a USB-C-to-HDMI adapter. The USB-C end connects to the computer, while the HDMI cable connects to the HDMI port on the adapter.
Step 2: Connect the HDMI Cable to Your TV
Find an available HDMI port on the television. These ports are commonly located on the back of the TV and are labeled with numbers such as HDMI 1, HDMI 2, or HDMI 3.
Connect the other end of the HDMI cable to the TV.
Take note of the HDMI port number. You will need it when selecting the correct source on the television.
The cable should also be long enough to reach comfortably between the computer and TV.
Step 3: Select the Correct HDMI Source
Turn on both the computer and television.
Using the TV remote, find the button labeled Source, Input, or a similar option. Select the HDMI input corresponding to the port where you connected the computer.
For example, if the cable is plugged into HDMI 2, select HDMI 2 as the TV’s source.
If everything is connected correctly, the television should display the computer’s screen.
How to Adjust Windows Display Settings
After connecting the PC and TV, Windows lets you control how the displays work.
Step 1: Open Windows Settings
Click the Start menu or press the Windows key on your keyboard.
Select the Settings icon.
Step 2: Open System Settings
Select System.
In Windows 11, System appears in the left panel. In Windows 10, select the System option.
Step 3: Select Display
Choose Display to open the computer’s display settings.
In Windows 11, Display is located near the top of the right panel. In Windows 10, it appears as the first option in the left sidebar.
Step 4: Select the TV Display
Windows should show two rectangles representing the connected screens.
In a typical laptop setup, the built-in computer display is labeled 1, while the TV is labeled 2.
Select display 2 to change the TV’s settings.
Step 5: Detect the TV if Windows Does Not Show It
If only one display appears, Windows may not have detected the television.
Select Detect in the display settings.
In Windows 11, the Detect option is located under Multiple Displays. In Windows 10, it appears below the visual representation of the connected displays.
You can also adjust the resolution if necessary.
For an HDTV, the source recommends selecting 1920 x 1080. For a 4K TV, you can select up to 3840 x 2160, or the highest available resolution.
Step 6: Choose How the TV and PC Work Together
Once Windows recognizes the television, you can choose how the two screens are used.
The available options include:
- Extend these displays: Expands the desktop across the PC and TV so windows can be moved between them.
- Duplicate these displays: Shows the same content on both screens.
- Show only on 1: Uses only the computer display.
- Show only on 2: Uses only the TV.
For example, extending the display gives you two separate screen areas, while duplicating displays shows the same desktop on both screens.
How to Fix Common PC-to-TV HDMI Problems
An HDMI connection can sometimes work visually but still require additional settings. Other problems may involve the TV not detecting the computer at all.
Fix: Sound Is Coming From the Computer Instead of the TV
If the picture appears on the TV but the audio remains on the computer, change the Windows audio output.
- Click the speaker icon near the clock in the system tray.
- Click the arrow next to or above the volume slider.
- Under Output device in Windows 11, or Playback device in Windows 10, select the TV.
The TV should then be selected as the audio output device.
Fix: The Computer Screen Does Not Appear on the TV
If the TV remains blank, start with the physical connections.
Check that:
- The HDMI cable is securely connected at both ends.
- The computer and TV are turned on.
- The TV is set to the correct HDMI source.
- The HDMI cable is connected to a working TV port.
If necessary, connect the cable to another HDMI port on the television and select that port using the Source or Input button.
You can also check Windows display settings. Right-click an empty area of the desktop and select Display Settings. Select display 2 and try another resolution.
If Windows does not show two displays, open Multiple Displays and select Detect.
If the problem continues, restart both the computer and TV or try another HDMI cable.
Fix: Text and Images Look Too Large or Too Small
Windows provides display scaling controls that can change the size of text and other items on the TV.
Right-click an empty area of the desktop and select Display Settings.
Select display 2, which represents the TV.
In Windows 11, use the drop-down menu next to Scale to increase or decrease the size.
In Windows 10, select a larger or smaller option under Change the size of text, apps, and other items.
How to Connect a PC to a TV: Quick Checklist
If you want the process in its simplest form, follow this checklist:
- Connect one end of the HDMI cable to the PC.
- Connect the other end to an HDMI port on the TV.
- Turn on the PC and TV.
- Select the matching HDMI source on the TV.
- Open Settings > System > Display in Windows.
- Select display 2 if the TV is detected.
- Choose between extending, duplicating, or using only one display.
- Adjust resolution or scaling if the picture does not look right.
- If there is no sound, select the TV as the Windows output device.
- If the TV is not detected, check the connections, try another HDMI port or cable, and use Windows’ Detect option.
Frequently Asked Questions
Can I connect a PC to a TV if my computer does not have HDMI?
Yes. The appropriate adapter or cable depends on the port available on the computer. USB-C can use a USB-C-to-HDMI adapter, while HDMI mini, MiniDisplayPort, and DisplayPort can use compatible cables.
Older computers with VGA or DVI can use VGA-to-HDMI or DVI-to-HDMI adapters. With those connections, however, audio will remain on the computer.
How do I make my TV show the computer screen?
Connect the HDMI cable, select the corresponding HDMI input on the TV, then open Windows Display Settings. If the TV is detected as display 2, select it and choose the desired display mode.
Can I use the TV and computer screen at the same time?
Yes. Select Extend these displays to use the TV and computer as separate displays, or select Duplicate these displays to show the same content on both screens.
What should I do if Windows does not detect my TV?
Check that both devices are powered on and the HDMI cable is securely connected. Try another HDMI port on the TV, select the corresponding input, and use the Detect option under Windows display settings. Restarting both devices or trying another HDMI cable can also help.
How do I get sound from my PC through the TV?
Open the Windows audio controls by clicking the speaker icon near the clock. Under the available output or playback devices, select the TV.
Conclusion
Learning how to connect a PC to a TV with HDMI mainly involves three steps: connecting the cable, selecting the correct HDMI source, and configuring Windows display settings.
Once Windows recognizes the TV, you can choose whether to extend the desktop, duplicate the screen, or use the television as the only display. If something goes wrong, checking the HDMI connection, TV input, display detection, resolution, and audio output can resolve many common problems.
Read More : How to Set Up Microsoft Authenticator Securely