
HowToForYou.com – In today’s performance-driven computing environment, even small hardware optimizations can make a noticeable difference. One setting that often gets overlooked is the mouse polling rate. For gamers, designers, and even everyday users, understanding how to adjust mouse polling rate can help unlock smoother cursor movement and faster response times.
This guide breaks down what polling rate really means, how it differs from other settings, and how to change it safely based on your setup.
What Is Mouse Polling Rate?
Mouse polling rate refers to how often your mouse reports its position and clicks to your computer. It is measured in hertz (Hz), which indicates the number of updates sent per second.
For You :
Here’s a quick look at how polling rate translates to response time:
- 125 Hz → 8 milliseconds
- 250 Hz → 4 milliseconds
- 500 Hz → 2 milliseconds
- 1000 Hz → 1 millisecond
- 4000 Hz → 0.25 milliseconds
- 8000 Hz → 0.125 milliseconds
The higher the rate, the more frequently your system receives input data, reducing delay and improving responsiveness.
Polling Rate vs DPI: Don’t Confuse Them
A common misconception is that polling rate and DPI are interchangeable. They are not.
For You :

- Polling Rate controls how often data is sent.
- DPI (dots per inch) controls how far the cursor moves relative to physical mouse movement.
You can have a high DPI with a low polling rate, or vice versa. For optimal performance, both settings should be balanced based on your needs.
How to Change Mouse Polling Rate
Adjusting your mouse polling rate depends on the hardware and software your device supports. Here are the most effective methods.
1. Use Built-In Mouse Controls
Many premium mice come with dedicated buttons that let you cycle through polling rate presets. These are often indicated by LED color changes or quick on-screen notifications.
For You :

This method is the fastest and requires no additional software.
2. Use Keyboard Shortcuts During Setup
Some mice allow polling rate adjustments via key combinations when reconnecting the device. For example:
- Hold specific number keys while plugging the mouse back in
- Watch for indicator lights confirming the change
This approach varies by manufacturer and is typically found in enthusiast or legacy devices.
For You :

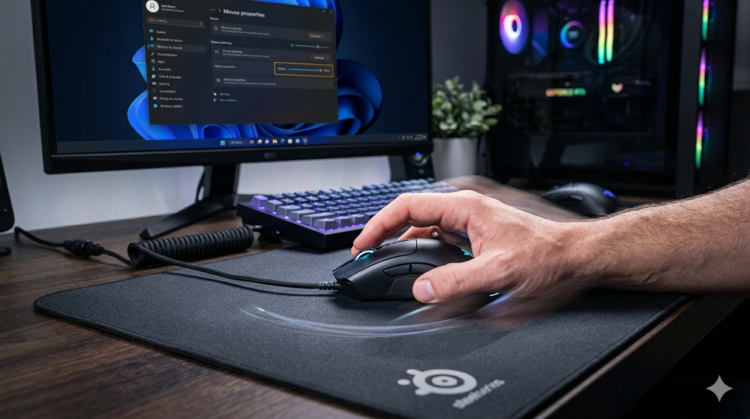
3. Use Official Software from the Manufacturer
Most modern mice offer companion software that gives full control over performance settings. These apps are the most reliable way to fine-tune polling rate.
Common tools include:
- Razer Synapse
- Logitech G Hub
- SteelSeries GG
- Corsair iCUE
- HyperX NGENUITY
Inside these programs, look for settings labeled “Polling Rate” or “Report Rate,” then select your preferred value.
For You :

4. Use Third-Party Tools (Advanced Users)
If your mouse lacks official support, specialized utilities can sometimes modify USB polling behavior. These tools essentially “overclock” the USB input rate.
Be cautious:
- Not all devices support this
- It may introduce instability
- Incorrect use can cause system issues
This method is best reserved for experienced users.
For You :

How to Check Your Mouse Polling Rate
If you’re unsure what your current polling rate is, online tools can measure it in real time.
To test it:
- Open a polling rate checker website
- Start the test
- Move your mouse in circles continuously
- Review your average and peak results
This gives a realistic snapshot of your mouse’s performance under normal conditions.
For You :

Does Increasing Polling Rate Actually Improve Performance?
Yes—but only under the right conditions.
When You’ll Notice a Difference
- High-refresh monitors (120Hz, 144Hz, 240Hz+)
- Fast-paced gaming (FPS, competitive esports)
- Precision tasks like graphic design or video editing
When You Won’t
- Standard 60Hz displays
- Basic office or browsing tasks
- Lower-end CPUs that can’t process high input rates efficiently
In fact, pushing polling rate too high on weaker systems can cause input lag or unnecessary CPU load.
Key Factors That Affect Performance
1. CPU Capability
Higher polling rates require more processing power. If your CPU can’t keep up, performance gains disappear.
For You :
2. Monitor Refresh Rate
Your display limits what you can actually perceive. A 60Hz screen won’t benefit much from ultra-high polling rates.
3. Application Support
Not all games or software are optimized for extremely high polling rates like 4000 Hz or 8000 Hz.
Practical Recommendations
- Casual users: 125–250 Hz is sufficient
- Gamers: 500–1000 Hz offers a strong balance
- Competitive players: 1000 Hz+ may provide marginal gains if hardware supports it
Also keep in mind: higher polling rates can reduce battery life on wireless mice.
For You :

Final Thoughts
Understanding how to change mouse polling rate is less about chasing the highest number and more about finding the right balance for your setup. While higher rates can improve responsiveness, the benefits depend heavily on your hardware and usage.
For most users, moderate settings deliver the best real-world results without unnecessary strain on the system.
For You :