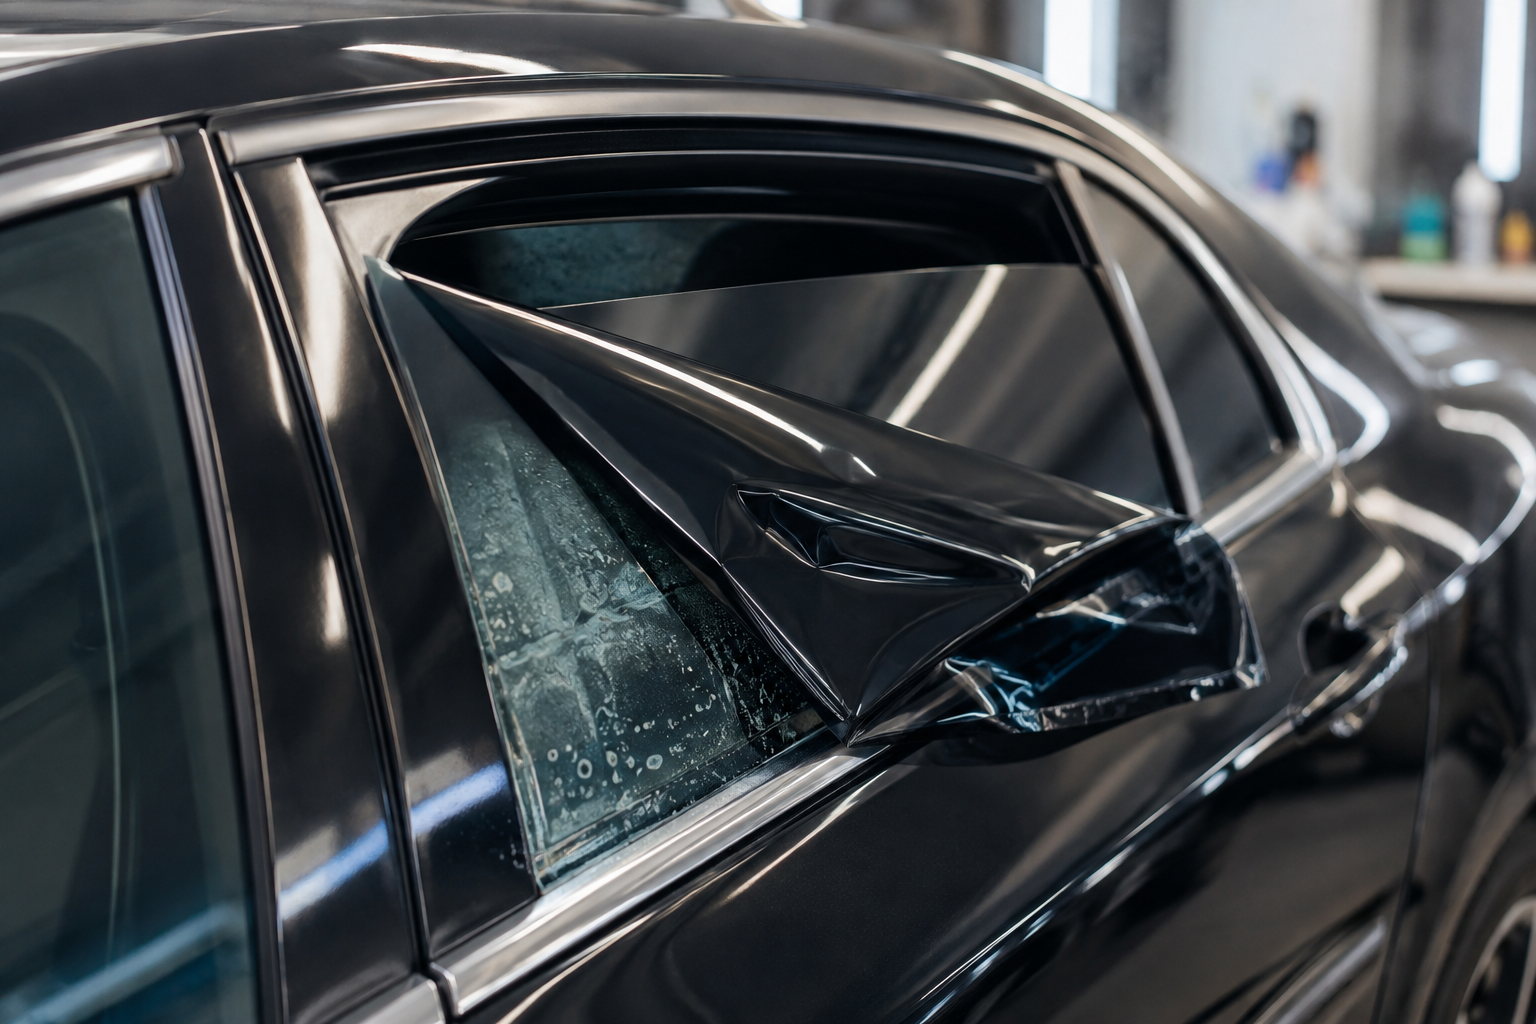
HowToForYou.com – Tinted car windows can provide privacy and help block ultraviolet sunlight rays. For drivers who want to install window film themselves, the process requires careful preparation, accurate cutting and plenty of soapy water.
Learning how to tint car windows is less about rushing through the installation and more about keeping the glass and film clean while positioning the material correctly. Dust, dirt, trapped air and poorly cut edges can make the process considerably more difficult.
This guide explains the process from preparing the windows through applying the finished film.
What You Need to Tint Car Windows
Before starting, gather the basic materials needed for the job:
- Window tint film
- Soapy water made with warm water and a few drops of dish soap
- Spray bottle
- Clean rag
- Squeegee
- Hard edge or hard card
- Precision knife or utility knife
- 1-inch razor blade
- Heat gun
- Vacuum cleaner
A clean, dry workspace is also important. The source recommends working indoors when possible. If you work outside, choose an environment that is clean and dry.
Why Window Preparation Matters
The preparation stage is one of the most important parts of car window tinting. Any dust, grime, adhesive residue or other debris left on the glass can interfere with the film.
Start by removing stickers and adhesive residue from the inside of the window. Remove anything inside the vehicle that could interfere with your work, then vacuum the interior to reduce dust.
Clean Both Sides of the Window
Mix a few drops of dish soap with warm water. Spray or wipe the solution onto the glass and use a 1-inch razor blade to remove dirt and grime.
Clean both sides of the window thoroughly, paying particular attention to the edges and seals. Lower the window slightly so you can clean the upper portion, then roll it up when necessary to reach the bottom.
The source specifically warns against using Windex or cleaners containing ammonia for this process.
You will use a substantial amount of soapy water during the installation, so preparing it ahead of time can make the work easier. A spray bottle is recommended.
After cleaning, dry the window with a clean rag. A squeegee can help remove remaining water. Make sure the edges and the areas underneath the interior seals are clean as well.
How to Measure and Cut Window Tint Film
Once the glass is clean, the next challenge is getting the film to the correct size.
The film should initially be measured against the outside of the window. This makes it possible to shape the film before moving it to the inside for installation.
Keep the Protective Liner in Place
Do not remove the release liner while measuring and cutting. The adhesive side should remain protected until you are ready to apply the film.
Place the tint over the outside of the window with approximately 2 to 3 inches of extra film extending beyond the edges.
Cut a manageable section from the larger roll rather than trying to work with the entire roll.
Shape the Film to the Window
Spray the film with a thin layer of soapy water. Then use the edges of the window as guides while trimming the film.
The basic process is:
- Cut along the bottom and left edges.
- Shift the film toward the left edge to ensure sufficient coverage.
- Cut along the right edge.
- Move the film back toward the center.
- Pull the film downward so the bottom extends below the window.
- Lower the window slightly.
- Use the top of the window as a cutting guide.
- Trim excess material from the corners.
The goal is to finish with film that follows the shape of the window while retaining some excess around the edges.
Use Water to Position the Film
Soapy water plays an important role throughout the process. It temporarily allows the film to slide across the glass, making it easier to position and adjust.
If the film stops adhering correctly while you are measuring, remove it, spray additional soapy water and place it back on the window.
Once the film has been shaped, use a heat gun and hard card to push trapped water and air toward the bottom. Work from the top downward and continue smoothing the film.
The source notes that the appearance of zigzagging from trapped air during this stage is normal as the air is pushed downward.
How to Apply Window Tint to the Inside of the Window
After the film has been cut and shaped, the actual installation begins.
Step 1: Prepare the Inside of the Glass
Clean the inside of the window again using soapy water and a squeegee. Use a hard edge to reach between the window and the seal where necessary.
The cleaner the surface, the easier it is to position the film.
Step 2: Remove the Top Half of the Release Liner
Peel away only the top half of the release liner initially.
Removing the liner gradually makes the film easier to handle and helps prevent unnecessary problems while positioning it.
Step 3: Wet the Exposed Film
Spray the newly exposed adhesive side with fresh water.
The window and film should remain wet so the material can be moved into the correct position.
Step 4: Position the Top Edge
With the window slightly lowered, line up the top edge of the film with the top of the window.
Because the surfaces are wet, the film can be adjusted before it is firmly secured.
Step 5: Work the Film Under the Seals
Gently pull the window seal back while pushing the film underneath it with your fingers.
Work on both sides and keep the film wet with soapy water. This makes it easier to move the material into position.
Step 6: Push Out Water
Spray the window again and use a squeegee or hard edge to push water toward the sides.
Keep one hand on the film while working with the squeegee so the material does not shift.
At this point, avoid pushing toward the bottom because the lower portion of the release liner still needs to be removed.
Step 7: Install the Bottom Portion
Roll the window up and spray the lower section with soapy water.
Remove the remaining release liner and spray the exposed film with water. Then use your fingers and a hard edge to tuck the lower edge underneath the bottom seal.
Step 8: Remove Remaining Water and Air
Finish by smoothing the film with the hard edge. Push water and air bubbles outward toward the edges.
Continue spraying the film with soapy water as needed and work downward and outward to reduce the risk of tearing the liner.
Common Problems When Tinting Car Windows
Several problems can make a DIY window tint installation more difficult.
Creases in the Film
Whether a crease can be removed depends on how severe it is. Some creases can be worked out with a credit card, while others may require starting over.
Fingerprints
If fingerprints are getting onto the film, wet your fingers before handling it. Soapy water can help keep the process cleaner.
Dust and Dirt
Dust is one reason the preparation stage matters so much. Clean the glass thoroughly and vacuum the vehicle’s interior before beginning.
Film Sticking Too Early
The source emphasizes the importance of soapy water because it allows the film to move across the glass. Keeping the film and window adequately wet helps make positioning easier.
Step-by-Step: How to Tint Car Windows
For a quick overview, follow these steps:
- Find a clean, dry workspace.
- Remove stickers, adhesives and interior obstructions.
- Vacuum the interior.
- Clean both sides of the window with soapy water.
- Use a razor blade to remove dirt and grime.
- Dry the glass and its edges.
- Determine which side of the film has the adhesive.
- Spray the outside of the window with soapy water.
- Position the film over the outside of the window with extra material around the edges.
- Cut a manageable section from the roll.
- Spray the film with soapy water.
- Trim the film to follow the window’s shape.
- Use a heat gun and hard card to remove water and air from the shaped film.
- Clean the inside of the window again.
- Peel away the top half of the release liner.
- Wet the exposed film.
- Position the top edge on the inside of the window.
- Work the sides under the seals.
- Squeegee water toward the sides.
- Roll up the window and install the lower portion.
- Remove remaining water and air bubbles with the hard edge.
Important Considerations Before Tinting
The source material includes an important warning about window tint regulations. Different countries have different rules governing tinted passenger-vehicle windows.
Check the legal amount of tinting permitted in your state or country before installing window film.
It is also important not to crease the film during installation. An extra set of hands can be helpful when handling the material.
Frequently Asked Questions
Can you tint car windows yourself?
Yes. The source states that most people can tint their own windows with a few basic tools, although the process can be long and time-consuming.
Which side of the window does the tint go on?
The tint is applied to the inside of the window. The film is initially sized and cut on the outside before being moved inside for adhesion.
Should the window tint film stay wet during installation?
Yes. Soapy water is used repeatedly to keep the film and glass slippery enough to position the material and push out water and air.
Can creases be removed from window tint?
It depends on the severity of the crease. Some can be worked out with a credit card, while more serious creases may require starting over.
What should you use to clean the windows before tinting?
The source recommends warm water mixed with a few drops of dish soap, along with a 1-inch razor blade for removing dirt and grime. It specifically warns against Windex or cleaners containing ammonia.
Do you need special tools to tint car windows?
The process uses several tools, including a spray bottle, squeegee, precision knife or blade, razor blade, hard card or edge and heat gun.
Conclusion
Learning how to tint car windows requires careful preparation, precise cutting and controlled application. The most important stages are cleaning the glass thoroughly, keeping the film wet while positioning it, cutting the material accurately and using a hard edge to remove trapped water and air.
The process can be time-consuming, but following the steps methodically can make DIY window tinting more manageable. Before starting, remember to check the applicable tinting limits in your state or country.
Read More :