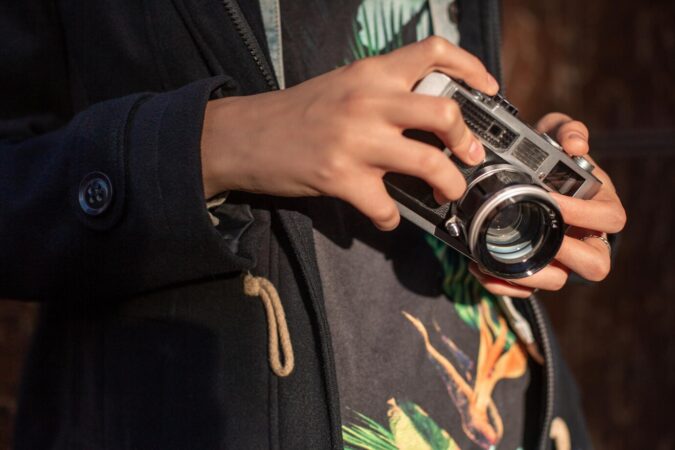
HowToFOrYou.com – In recent years, film photography has experienced a resurgence, captivating a new generation of photographers drawn to its nostalgic charm and distinctive aesthetic.
While digital photography remains dominant, film offers a unique and rewarding experience, encouraging photographers to slow down and truly engage with their craft.
If you’re just getting started with film photography, this guide will walk you through the basics, from selecting the right film to developing your photos.
Film vs. Digital Photography: Understanding the Key Differences
The most fundamental difference between digital and film photography is the method of image storage. Digital cameras record images as binary data on memory cards, whereas film cameras rely on a chemical process, exposing photosensitive film to light to create an image.
This traditional method introduces a tactile and intentional approach to photography, as photographers must carefully consider each shot before pressing the shutter.
Despite this core distinction, film and digital photography share many similarities. Understanding exposure settings—aperture, shutter speed, and ISO—is equally important in both mediums.
The main challenge with film is that ISO is predetermined by the film roll, requiring careful planning for different lighting conditions.
While this limitation may seem restrictive, it contributes to the unique appeal of film photography, pushing photographers to think creatively and develop a deeper understanding of exposure.
Choosing the Right Film
Selecting the appropriate film is crucial, as it determines color balance, contrast, and sensitivity to light. Film sensitivity is measured by ISO, and different environments call for different ISO levels:
- ISO 50–200: Ideal for bright outdoor conditions, producing fine-grain images with high detail.
- ISO 400–800: Suitable for indoor and low-light settings, offering a balance between grain and sensitivity.
- ISO 1600+: Designed for extreme low-light conditions but introduces noticeable grain, often used for artistic effects.
Additionally, color temperature plays a role in film selection. Tungsten-balanced films are optimized for artificial lighting, while daylight-balanced films perform best under natural sunlight. Experimenting with different film types can yield unique aesthetic results, from high-contrast black and white images to vintage-inspired color tones.
Loading Film into Your Camera
If you’ve acquired a second-hand film camera, always check for an existing roll before opening the back. Rotating the rewind crank will reveal whether a film is loaded—tension indicates a roll is present, while free movement suggests an empty chamber. If the camera is empty, follow these steps to load a new roll:
- Open the camera back by lifting the rewind knob or using the release switch.
- Insert the film canister with the leader pointing towards the take-up spool.
- Pull the film leader across and secure it into the spool.
- Advance the film using the lever, ensuring it wraps tightly around the spool.
- Close the camera and advance the film until the counter reads ‘0’.
- Set the ISO dial to match your film’s sensitivity.
Proper film loading prevents exposure mishaps and ensures seamless shooting throughout the roll.
Understanding Camera Controls
Most film cameras feature manual controls for adjusting exposure settings:
- Aperture: Measured in f-stops, aperture determines how much light enters the lens. A lower f-stop (e.g., f/2.8) results in a shallow depth of field, while a higher f-stop (e.g., f/11) enhances sharpness throughout the image.
- Shutter Speed: Expressed in fractions of a second, shutter speed controls the duration of light exposure. Faster speeds (e.g., 1/1000s) freeze motion, while slower speeds (e.g., 1/30s) introduce motion blur.
- ISO Sensitivity: Unlike digital cameras, film ISO is fixed for an entire roll. To adjust for changing light conditions, photographers must modify shutter speed and aperture accordingly.
Some cameras include automatic and semi-automatic modes, allowing beginners to experiment before fully embracing manual settings.
Focusing Techniques
Film cameras offer both manual and autofocus options. Autofocus models, introduced in the mid-1980s, operate similarly to modern digital cameras—pressing the shutter halfway activates the focus mechanism.
However, many film cameras require manual focusing, which involves adjusting the focus ring on the lens until the subject appears sharp. Rangefinder cameras use a split-image focusing system, requiring precise alignment for clarity. Mastering manual focus is a valuable skill that enhances creative control.
Developing Your Film
Once you’ve captured all frames on your roll, it’s time to develop the film. Before opening the camera, ensure the film is fully rewound into the canister. Depending on the camera model, rewinding may be automatic or require manual cranking. When there is no resistance, it is safe to open the camera and remove the film.
Film development can be done professionally or at home. Many labs offer high-quality processing, with options for scanning and printing.
For those interested in DIY development, essential materials include developer chemicals, a darkroom or lightproof bag, and a film scanner. While home development requires a learning curve, it adds a rewarding hands-on aspect to film photography.
Experimenting and Finding Your Style
Film photography is as much about experimentation as it is about technique. Trying different films, cameras, and processing methods can lead to unique artistic results.
Some photographers embrace film grain for a vintage aesthetic, while others manipulate exposure and development techniques for creative effects. Accessories such as colored filters, light leak simulators, and specialty lenses further expand artistic possibilities.
Film photography fosters patience, intentionality, and a deeper appreciation for the photographic process.
Whether you’re capturing everyday moments or exploring artistic expression, each frame becomes a tangible piece of history. As you continue your journey into film photography, embrace the learning process and enjoy the magic of shooting on film.
